Wednesday, 18 May 2016

Mutiny on the Bounty - Part One

I'm a bounty hunter! Wooo!

The Galactic Civil War is a Vassal tournament run via the FFG Armada forums. I've watched the recent tournaments (I had my wisdom teeth out during the World Cup, so watched an awful lot of games while high on pain killers), and I really wanted to sign up for this one - but I've been studying, and May is a pretty busy time work-wise, and so I wisely said, "No. Not yet. Soon. Next time."

And then I promptly signed up, but missed out on joining a regular team. So I signed up as a Bounty Hunter (a fill-in if someone can't do their battle). I played in the second round as a fill-in for Lyraeus and his imfamous "Dodonna the Oppressor." It certainly worked for me, and I was able to bring home a 10-0 for Lyraeus and his team - it was a pretty good match up for the list - initiative, activation advantage, no fighters.
(the Oppressor)

Now, in the last round, I'm one of two rebel bounty hunters taking on 2 Imperials. We have to take the Wave 3 Commanders, and are limited to few unique units, but that's to the Rebels' favour - no Demolisher, no Major Rhymer.

Deep in our hidden rebel base we plotted - I decided to take a poor-man's Dodonna the Oppressor, without the intel officers (Tagge restores discarded defence tokens), and with enough deployments and activations to make a lesser man weep.
(actual rebel base not shown)

My list is called "Mutiny on the Bounty." 2 Torpedo Frigates, OE, APT, one with H9s (for the anti-Gozanti accuracy), the other as flagship with Advanced Projectors (useful against fighters).
Two CR90s with TRCs for long range fire support, and two GR75 generics with one as Bright Hope. The GRs are for fighter command, and /I have six A-wing squadrons to slow down enemy bombers, and give a deployment advantage.
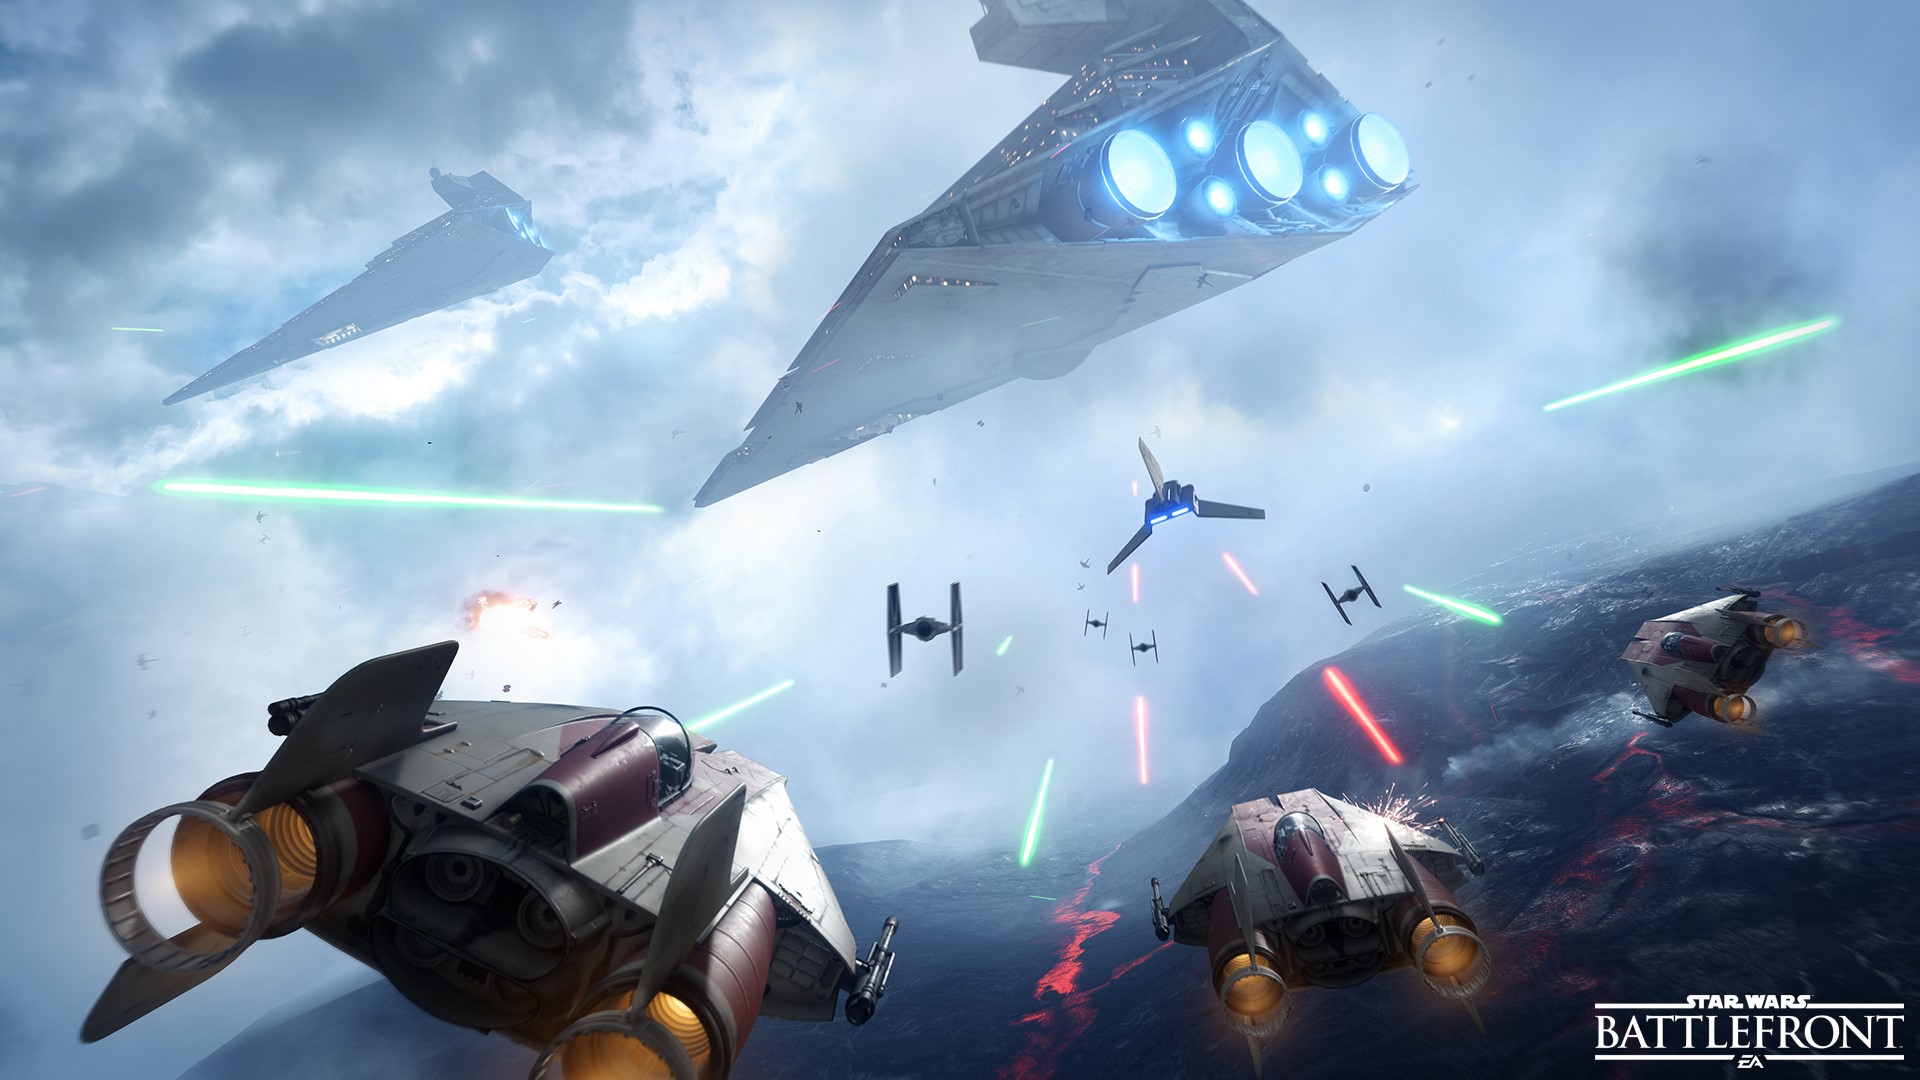
(A-Wings head for the Star Destroyer, blasting aside Tie Fighters incidentally along the way...)

One of the great things about The Galactic Civil War (particularly now I have finished my last assignment, and can devote far-too-much-time to thinking about this sort of thing) is that you get told who you are fighting against, sometimes up to two weeks in advance. In my fill-in game for Lyraeus, I had a couple of days to think about the opponent's fleet, his likely missions, strategy, etc.

For this game I've been paired against Sanguinary Dan, and his Admiral Tagge fleet. It's an interesting fleet - two ISDs with Xi7s, Boosted Comms, Ordnance Experts (no Gunnery Teams! Hooray! Well done Biggs, your propaganda machine is working!), a lone raider, and six Tie-Interceptors.

My 10 point bid is enough to guarantee me initiative, I have activation advantage (6 to 3 - which is excessive, but I was planning against Gozantis), and deployment advantage (9 to 6 - my last three ships go down after he has deployed everything). Yes, his ISDs can kill anything of mine in one activation in the front arc, but maybe I won't be in his front arc? Or at least, not often or with much.
To my mind, things are heading the right direction. Initiative, activations, deployment - all in my favour. Now I just need to rig the dice, bribe the umpires, and hide a tyre-iron somewhere about my person...


*******

I managed to get in a practice game today against MattShadowlord (handed in my last assignment today, so able to relax and muck around without feeling overly guilty). It went well. I lost all of my A-Wings being too aggressive early on - I need to hold them back a bit, and use the AFF (anti-fighter-fire) from my GR75s to even the odds a bit more - not really sure how I'm going to do this, when they need to be going speed 3 to benefit from Cracken. Perhaps they should run parallel to the battle? Or just speed up later if necessary?
Bright Hope ended in short range of the rear and side arcs of an ISD-I, and did not take a scratch (even without scattering once).

My torpedo frigates behaved wonderfully, chopping the ISDs down to size very quickly - My first hitter has the H9s, which means no brace for you, Johnny! (ECMs aren't a thing in this battle - more advantage to the Rebels in this Civil War...), and the second torpedo frigate (with the General on board) rammed an ISD to death, before activating in the next round with double arc (side and rear) on the other ISD front. It went down. Hard. Even without the H9s.


H9s are great, in that they guarantee you can turn a dice with a hit to an accuracy, which is great for shutting down scatter on the flottillas (which is why I took them), or shutting down the brace on non-ECM capable vessels. But, with the side arc of Torpedo Frigate, there's a 50% chance you won't need the H9s. But but, Torpedo Frigates are probably going to get one, maybe two broadside shots off in a battle. Making that 50% into 100% is probably worth 8 points (yes, 8! I couldn't believe it either!). H9s are a turbolaser upgrade, but for some reason you can take Turbolasers on the Torpedo Frigate, a ship with no turbolasers. Very strange, and something that I don't think gets commented on enough by the bloggerati or podcasteritti.


I'm confident that this is my game to win or lose - now I just need to hang on for the next week while I wait for my opponent to get his computer repaired, and then fight timezones to make it happen. This game might happen after 11pm for me, so I'll need to be caffeinated and planning a lazy-day to follow.


Wednesday, 27 April 2016

SpaceCon II - Jeff Strikes Back!

I'm not sure who Jeff is, but he certainly struck back.

SpaceCon II was held at Three D6 in Canberra, April 24, 2016. This was the store's championship event, and 14 players took part. Six from the Parramatta Attack Wing made the trek, 7 locals from Canberra, (edit: apparently two of these seven were from Newcastle - my apologies) and your humble correspondent representing Task Force Orange.

My Armada associate and rival, Theo, had planned on going, and had even asked to borrow one of my AF2s so he could run a three-whale Akbar fleet. I therefore planned on a variety of other things, including a Dodonna 3xTRC90, 2xMc30 strike fleet. But with only a few days to go Theo announced that [i]apparently[/i] his son's first birthday took priority, and so I could have my AF2 back.

Quandary!

Ought I continue with my planned alternative, or return to my natural love of Akbar AF2s?

I spent a few days designing and redesigning (when by rights I should have been studying), ended up with a list I though might work, and took [i]only those ships and no others[/i] away with me on holidays.

I then played four games with that list on Vassal against various opponents.

Whoops.

I lost every game.

By a lot.

So, more redesigning, a quick run to the local games shop (I needed another Mc30 anyway), and I had my list for the tournament. Two AF2s with Gunnery Teams and TRCs (one with ECM to protect Akbar), a naked Mc30 Scout, and an upgraded Torpedo Mc30 with Xi7, OE, APT. Two A-Wings rounded out the side, as sacrificial lambs to keep the bombers [i]slightly[/i] at bay. A 14 point bid ought to be enough to guarantee first player in most cases...


Round One was against Tristan, the eventual tournament winner. He was fielding one of the two Rhymer balls of the Tournament, with a Victory I, Demolisher, and a Raider for fun. I chose to go first, picked his contested outpost objective, and deployed.

And that's where things went wrong. In my plan and practice, there was a Mc30 on each side of my deployment to guard the front of my AF2s, regardless of which way they turned. Instead, for reasons passing understanding, I put them both on the left. Tristan had more deployments than me, so Demolisher was not yet on the table.

He put it on my right, away from the Mc30s. Clever, clever. With activation advantage and initiative, I should have been able to make Demolisher move, then park a Mc30 in its face, ready for next turn, before blowing it to bits. That was the plan. Now my Mc30s were out of place, and out of options.

This shot shows the start of turn 2. I'm not sure if I had even yet realised the absolute mess I had made of this battle. I turned my Mc30 towards Demolisher, hoping for a 'hail mary run', but then I made matters worse by turning my battleline [i]towards[/i] Demolisher. Lesson one in the Assault Frigate Captains course should be: Always turn away from Demolisher. Run. Run for the hills.
Tristan has gone to speed 0 on his Victory, which also took me by surprise, and denied my AF2s anything to shoot at for quite a long time. Too long a time.
Of course, Tristan didn't claim the station, which also took my by surprise. His first deployment, the Raider, is headed for the far reaches of the galaxy, planning on surviving the game even if the other ships perished, to give the fighters a chance to wipe out my ships should things turn nasty.
In my head, I'm thinking - "I can't kill those fighters. I have to kill the three ships to end this battle in my favour." As a result, my naked Mc30 Scout has set out to chase down and destroy that Raider, and will follow it to the edge of the map and the end of the game.

Start of the turn 2, and I should have turned the AF2s to the left, and headed for the station, away from Demolisher, and towards the Victory. What do I do instead?

The exact opposite. Start of turn 3. My AF2s have continued their turn, and the front one has been picked apart and destroyed by a combination of enemy fighters and Demolisher. The second one, with Akbar on board, is headed for the same fate.
My Mc30 Scout is still on track to take down the Raider, and my Mc30 Torpedo Frigate is headed on a suicide run straight at the Victory. Sadly, my turn 1 turn to the right means that Mc30 is out of close range of the Victory at the start of turn 3. I suppose I assumed it would speed up a little... but Tristan is very clever, and knows his fleet backwards.

Start of turn 4. My Flagship is still alive, and my Torpedo Frigate has survived a full frontal barrage from the Victory (he "whiffed" it). The Mc30 does very well against the Victory, bringing it to within 1 hull point of destruction - if I had rolled a single accuracy, it would have died, or if my APTs had gone off on the front arc with a reroll from Ordnance Experts - but, if wishes were fishes we'd all be knee deep in mackerel.

Start of turn 5, and the game is effectively over. My flagship and Mc30 are destroyed, and all that is left is for my Mc30 Scout to knock out the raider.

Game ends with bitter tears of remorse for me, and nine tournament points for Tristan.

Oh for a ten-minute time machine, and deploying according to the plan!

This rhymer / demo list was exactly what I had designed to defeat - win initiative, have activation advantage, hit Demolisher hard and move on.

A bad plan stuck to is better than a good plan changed. All credit to Tristan, all blame to me.


Game Two

My 9/1 defeat saw me at the very bottom table, with a young chap from Canberra called Jaidyn. He was on his third or fourth game of Armada total, and was still learning the game. He fielded an ISD, two VSDs, some generic Ties and Interceptors.
Again, I chose to go first, and almost picked "most wanted." I then suddenly changed my mind and went for Minefields. I probably should have gone for most wanted. Anyway...

This is the start of turn 1. Ackbar's flagship has hit a mine, and is headed off to the right. The other AF2 has taken a more moderate course, and is drawing the star destroyers into a trap... perhaps. My torpedo and scout are heading for Motti's flagship, the ISD, planning to bring it down.

The game went quite predictably - my A-Wings did not survive long against the Interceptors, but the Ties did little to no damage against the capital ships. The torpedo frigate swung wide and ended up "Akbaring" the ISD and his neighbouring VSD.

The scout frigate managed to head directly towards the ISD and totally fail to arrange a double arc.

The AF2s fired double broadsides at the various ships, and eventually whittled them down.

The Torpedo frigate did some fantastic sailing, double arcing the ISD and ending turn in a single side arc of the ISD.

It came down to the last turn, but all of the Imperial capital ships were destroyed, at the price of only one AF2.

This is the photo of the start of the last turn, and is upside-down on purpose.

This game ended 9/1 in my favour, and was sufficient to send me from the bottom table back to table 3. I went from 14th in the standings to 6th. Which was nice.


Game Three

The third game was against Luke from Canberra. His fleet was an ISD with two Raiders, and a Rhymerball with Firesprays. There were only two Rhymerballs that I saw at the Tournament, and I faced them both. I also faced three Imperial lists, which was a change for me - typically I face off against fellow Rebels. No Demolisher in sight.
Again, I chose to go first, and happily chose "Fleet Ambush," which can be something of a double-edged sword in my experience.

I had initiative and activation advantage, but not deployment advantage - HOWEVER! Fleet Ambush requires all capital ships to be deployed before squadrons. I managed to get my third AF2 to have arcs and range on two enemy targets from the first turn.


Start of turn 2, and my AF2 in the front is taking the full brunt of the ISD and Rhymerball - but it has done its job, damaging the Raider and putting some hits on the ISD.
I was surprised that Luke has sent his flanking Raider back into the melee - I assumed it would run to allow the Rhymerball to keep operating if the ISD and other Raider went down - and to prevent a tabling.

But the Raider came back in, and took some shots from various ships, while I geared up for a frontal assault on the ISD.

Another upside-down shot, showing the last throes of the battle, with only a Raider and the fighters left. I managed to kill the Raider, and ran with the Torpedo frigate as far as I could. The game continues until the end of the round, so the Firesprays chased the Torpedo boat and shot it to bits.

I won the game, but I'm not sure of the points difference anymore.


The Tournament ended with me sitting prettily in fourth place. After the first round massacre, I thought this was an ok outcome.


Thanks to Three D6 for hosting, and to my many and varied opponents for some good games.


Saturday, 26 March 2016

Penultimate Victory in Orange

In preparation for the Orange Store Championship, I ran my list at a practice session at the local games' club. In my practice games I am running two AF2Bs, with gunnery teams and enhanced armament, a MC30c with some upgrades, and a Corvette A with Leia Organa and Admiral Ackbar.
The Fighter complement is minimal, with two X-Wings and Jan Ors.

My first practice game was against Josh, a great bloke who introduced me and Noah to this game early last year.


Josh brought his ISD and two VSDs with a smattering of fighters. I think Screed was his Admiral. I have a bid of 15 points, and elected to go first. I chose Josh's minefields mission, and he deployed 3 on each side to produce a narrow middle of the board. I deployed in classic Ackbar Conga line, with the Corvette behind to hand out new orders and protect Admiral Fishlips. Josh deployed in the appropriate formation to break up the Conga line.


Start of turn 2, and my Ships have all made a hard turn to port, breaking the Conga line and heading for the "Ackbar Slash". My ships will sail between those Star Destroyers, firing left and right. The Gunnery teams won't come in so much use, but such is life.

Start of turn 3, and I have used my first / last activation to put my Tropedo frigate in prime position on the Victory Star Destroyer on left of photo. I'm still undecided about the MC30 - I think I'd rather another Assault Frigate. I chose the MC30 to go first, which left one of my Assault Frigates taking a very close range beating from the other Victory and ISD, but such is life...


 This is a close up of the central action. There are some fighters floating around, but by and large the "little war" had little impact on the capital ship action.

Start of turn 4, and the Victory on the left is gone, destroyed by a combination of double arcing with the Torpedo Frigate, and long range gunnery from my Assault Frigate(s). One of my Assault Frigates is in very bad condition, having only two hull left, while the other is in pretty good shape - but heading for ignominy! Ackbar and Leia are broadsiding the ISD from the Corvette, but without great effect.
Start of turn 5, and my fleet is through the enemy lines, having blasted the other victory to pieces. The ISD remains in fine fettle, and is chasing my crippled AF2 towards the left. Josh also has "Boba Fett" who can do some damage if he activates within range one of a ship or squadron. I hadn't read the fine print, and chose to ignore the bounty hunter with daddy issues, and so nearly lost the damaged Frigate. I flew some fighters in eventually, but this led directly to the destruction of Jan Ors.

My other Assault Frigate (the original lead ship) turned right instead of left, and as a consequence was travelling too fast and too close to the edge, and proceeded to engage the Mclaughlin Manoeuvre, and fly right off the board. Sad.

That wayward Frigate was the only Capital ship I lost, with an X-Wing and Jan Ors. Josh lost two Victory class Destroyers, and some Tie Fighters. In tournament points, it was a 7/3 in my favour.

Killing Imperial Class Star Destroyers is still something I struggle with, but Victories go "pop" with regular alacrity when confronted by Ackbar Assaults.

*****

I played one more test game at the Club, this time against Noah. Noah plays occasionally, and might one day actually buy some stuff. He played with my Imperials, which is quite a limited collection at this point. I again went first, and chose Noah's mission of "Fleet Ambush." I also cheated.
Due to the lateness of the hour and general gross incompetence, I deployed three ships in the ambush zone rather than the requisite two. I really have no idea how this happened, and Noah didn't pick it up, and it wasn't until the middle of the night that I suddenly woke up with the realisation that I was a no-good-lousy-cheating-jackass. 

I do hereby apologise to Noah for this oversight, and humbly beg his forgiveness.

Noah did a good job of getting stuck into the Ackbar Conga line, causing all sorts of troubles with collisions and ramming.  
I knocked out the twin gladiators in short order (one is already gone in this photo), but the Victories caused all kinds of trouble, blocking the advance and following up behind. My Frigates were too close together to be able to break out of line, and things were pretty bad for a while there. Eventually I knocked out the front Victory to release the blockage, but I'd lost frigate and most of the fighters.

This game was a victory to me, but only because I cheated so thoroughly in the set up. Noah taught me some good lessons about the vulnerability of the Ackbar Conga line, and I will make changes to my tactics heading forward.

*****
The day of the Store Championship arrived! I changed my list! (slightly) There were only two players! Total!

There had been some scheduling issues with the Store Champs, mostly because I objected to playing on a Sunday (again), and the suggested day change clashed with other things that Theo was doing.

I turned up expecting there to be no-one else in attendance, but Theo (pronounced Tay-Oh) from Bathurst was there with his Imperials and we had a game. This Theo had only played a few games in total, and I think all against the same guy from Bathurst, so there were a couple of things that I needed to gently remind / inform him about regards the rules.


My list had dropped the Corvette, and added a bunch of upgrades on my MC30c, and Raymus Antilles on the AF2. Bathurst Theo had an ISD, VSD, and raider, with some fighters. I had initiative, and chose Minefields. He deployed terrain, and set out the mines.


This photo is the start of turn 3, and I'm already missing my activation advantage. Four ships is where I am comfortable as first player - I love going first and last! My Frigates are angling to concentrate on the ISD, and the MC30c is creeping forward, looking for a last/first activation to get some serious hits into an enemy vessel. Bathurst Theo's ISD has landed in range of a mine, but he rolled double Accs, with no damage resulting. My fighters have massed on the station, and Bathurst Theo's have drifted off to the flanks - I think this was an example of his inexperience, since there was little the fighters did for most of the game.


Start of turn 3, and my Frigates have formed a mini-conga line and are preparing to blast the ISD and raider. My MC30c has geared up for a double arc on the VSD, and then the ISD moved towards it. My fighters launched attacks on the ISD, with limited damage.
For my first activation I have a choice of double arcing the VSD (red), or launching an Ackbar backed port-arc on the ISD. I decided that destroying the ISD was probably the main game, and the MC30c let rip with four black dice (cf) and four red. With Ordnance Experts and Xi7s, the little guy did a ton of damage, and then accelerated to get away and behind the VSD. I accidentally landed on a mine, and took a face up card of damage.

My Raymus Frigate Flagship took out the raider at long range, and then both frigates sent broadsides into the ISD. The ISD took a beating, moved forward, and the VSD couldn't move and rammed.


Start of turn 4, and thanks to the ram, my MC30c has close range on the back of the VSD. Another powerful broadside and the victory is down to half strength. There is a little bit of a fighter skirmish in the middle of the board, and I used Jan Ors to get my heavily damaged X-Wing out of the fray and onto the station for a necessary repair.
Unfortunately the ISD has moved out of range of my Frigates, who cannot turn fast enough to get back into range... I have sadly shot myself in the foot here - the ISD is very badly damaged, only being two or three hits off dead, with the VSD in much the same position. Neither of them is in range, and my frigates simply cannot turn fast enough to re-engage.

Start of turn 5, and my ships are turning and chasing, and the fighters are trying to reach the enemy vessels, but it is not going to work.

End of game positions, and I have not managed to take out any of the big imperial ships. On the other hand, my own ships have taken limited damage, with the MC30 still carrying its face-up card from the mine, and not much else.

I won the game, having taking out the raider and a few fighters. I lost an A-wing in response.

This game reminded me that I have not yet worked out how to kill an ISD. Perhaps I should have sent one of my Assault Frigates to ram the beggar for a turn, forcing it to sit in the centre of the board, and trust in my ECMs to keep me alive. As it was, after we flew past each other, Bathurst Theo had no intention of coming back to the fight, and I just could not turn fast enough. Perhaps I should have put some more Nav commands earlier in my stack. Or perhaps I should just decide that ISDs are too tough and focus on killing Victories and smaller. Raiders do not worry me much with Ackbar Frigates - one accuracy and they die pretty quick.

The game was a win to me, and I declared myself store champion of all Orange! Kneel at my feet, lowly peons!

However, with only two players we (that is, me and the shop folks) agreed that it probably shouldn't count as a store championship. They refunded my $15, and I left with my honorary title only. I won't get an 8 point bye at Regionals, but it seems most likely that I won't make it to Regionals at all....

Thus ended my Orange games.


Monday, 29 February 2016

Bathurst Store Championship

Sunday 28th February was store championship at Bathurst Game On. I had cleared with my fabulous wife for her to do the church things to let me attend. 

I had intended to bring a two frigate, two corvette list with Paragon, Dodonna, and five fighters including Jan Ors. But I did not sleep well the night before, and redesigned and redesigned until I ended up with an Ackbar fleet with two frigates, one corvette, and seven fighters, including Hans Olo.

I also included a SEVENTEEN point initiative bid, since I became paranoid about one a.m. about facing a CLONISHER fleet. Seventeen was more than enough to get me initiative and first player each time - I think seven would probably have done the same job, but "kay sarah" as we say in the old country.

I have never played an Ackbar list before, and had to borrow the card from my gentleman and scholar associate, Theodore. I also borrowed his Hans Olo, as the rogues and villains are on my "birthday" list.

Three games were played - all against rebel players. I think five of the eight players at the tournament brought the freedom fighters alliance - we had two Mon Mothmas, two Rieekans. I was the only Ackbar.


Game One - vs Nick from Parramatta Attack Wing.

Nick brought a Mon Mothma force with one frigate, torpedo boat, and Nebulon-B. He had seven squadrons, including Jan Ors.


This Photo is the start of turn 3 - I am first player, and the objective is Precision Strike. I was too aggressive with my fighter force, sending them forward too soon, and taking a number of hits from the otherwise unemployed ships. In the end I lost almost all my squadrons, without doing much in return.

The ship battle was quite the opposite. I managed to destroy all three of the enemy ships in succession. The Torpedo boat took some hits on the approach, then ended turn in side arcs of both my Assault Frigates, and was quickly eliminated. The Frigates then took out the Nebulon in quick order. 


I came close to losing the Corvette with the Admiral on board, but escaped. The scurrg bombers also came close to destroying one of the Assault Frigates, but came a bit short.


Nick's Frigate ended up ramming my Frigate, and ended turn on the asteroids. The next round of shooting finished it off.


The field at the end of the battle.

It ended up with a large margin of victory, and ended up as a ten-nil in my favour. The next game would be fought at the top table, a new experience for me!


 Game two was against Alex, also from Parramatta Attack Wing. He was fielding an MC80 battleship, a torpedo boat, and a Nebulon-B. His fighter force was four aces - Luke, Wedge, Dutch, and Keyan.

We deployed on opposite tacks, with me waiting for his ships to approach, and his ships doing their level best to avoid approaching my firing arcs. This was to be a long range episode, with the lion's work done by the fighters.


This is about the start of turn 3 or 4. We have avoided contact, but at this point I decide to throw the fighters against the Torpedo frigate. They did limited damage, but brought the aces into play. Ultimately very little shooting occurred, and Alex succeeded in destroying my four X-Wings and two B-Wings. Only Hans Olo survived, and I took out Dutch and Wedge.

The difference at the end of the game was 74 points, which means 7-3 in Alex's favour. Had just one of the B-Wings survived, it would have been 6-4. That one point would have made a big difference at the end of the day.

I should have either been more aggressive with the Assault Frigates, or held the fighter wing back, and made the aces come to me... perhaps next time the aura of the top table will not be so frightening.


The final battle was against my arch-nemesis and good friend, Theo. We have fought any number of battles over the past year since I moved to Orange, and generally he comes out ahead. It is rare that I manage to beat him, and I thought that this time would be no exception.


Theo was flying a half-swarm with 4 Corvette As, a torpedo boat, and an Assault Frigate. The Corvettes were armed with Turbolaser Reroutes, making them punch a bit more weight. I chose first player, and had a choice between Opening Salvo (10 extra black dice for Theo - Yikes!), Intel Sweep (hmmmm...) or Fire Lanes. I went with Fire Lanes, thinking Theo would spread out the obstacles, and I might be able to control one or two. Instead, he put them all together, and I moved them towards me in a bunch. We should have just stacked them on top of each other, since we had at least one interesting turn of working out who exactly had range with what dice to claim which objective. That aspect of Fire Lanes has always put me off... all that paperwork!


We deployed, and I went for the objectives, and so did Theo. At the end of round one he had the most dice on the objectives, and won 45 points. It would be the last time that happened...
The Corvette swarm puts out a lot of hits, and with Mon Mothma in the frame, my own return fire was less than satisfactory. I decided that killing the lady in white was my first task, and I managed to bring her ship down at the start of turn 3. One of my assault frigates was badly mauled, with no shields and only two hits remaining. My B-Wings were tied up by an A-Wing, and my X-Wings were too far away to help. Also, both my Frigates were the in side arc of the Torpedo boat at close range. It was a disconcerting moment.


This photo was not taken by me, (many Bothans died to bring it back to this blog) but it is the best one to show the battle at its moment of crisis. Truly, this was the dark night of the soul for this particular battle. For those who don't know, I'm the chap in red. If you look carefully at my shirt, you might learn something about my true feelings regarding the Star Wars franchise.

Anyhoo, my nearly dead frigate activated and destroyed Mon Mothma, and nearly took out another Corvette. Theo had a choice to make as to which of his ships to activate next - the torpedo boat which was in a good position to fire on either Frigate, or the nearly dead corvette, which would blow up in stiff breeze (not surprisingly, since it is designed for space travel).

He chose the corvette. It fired its guns, and ended my Frigate, then move rapidly forwards, towards, I assumed, a ramming and glorious death on my other Frigate. Instead, Theo moved it behind my ship, avoiding the ram (presumably to give me an extra target). Unfortunately, his placement ended up with his Corvette overlapping his A-Wing by a smidge (some might say a half-smidge), and I got to relocate his fighter, which I did, by moving it as far from my B-Wings as possible. My next Frigate activated, had a squadron order in the offing, and sent the B-Wings at the Torpedo boat, followed by a nice round of close range Ackbar enhanced armament broadsides fun. The Torpedo boat went pop!

And so did Theo's left ventricle.


This picture shows the outcome of the crisis moment - of Theo's five ships, only two remain (the ones on the left of the picture), while I still have my Frigate (The Communal Liberty), and my Corvette (Observant Facilitator) (on the right). I also have fighter superiority, with only two sets of A-Wings left in action, and I've only lost one X-Wing (if memory serves).

I also had dice on the objectives, and the rest of the game involved me shooting Theo's last corvette at long range and dusting it quite handily, and then gently turning around the objectives with both ships. We had a moment of hilarity when Theo pointed out that the "toggle" on one of my fighter squadrons was overlapping an objective, and it therefore belonged to him. As an act of magnanimity I did not argue the toss, but gave him that one objective. The problem was resolved in the following turn, because although the fighter was engaged and could not move away, the toggle was switched to the other side, and no longer overhung the objective.

I suppose I could have turned my Frigate to pursue Theo's and potentially destroyed it, and in retrospect that might have been the right thing to do. Our game ended as a 9/1 to me, leaving me with 22 tournament points for the day. 22.

22.


The final battle was happening on another table, and Alex (my second round opponent) was dealing with Dan, who had beaten Theo in the first round with some amazingly lucky rolls and critical effects.

I don't think they played all six rounds, but ran out of time. Their game came to a 7/3 in favour of Alex, putting him on 23 tournament points for the day. 23.

23.


Gah!


One alive B-Wing in game two, and we would have tied on tournament points. My MOV (whatever that TLA stands for) was much higher than Alex's (Thanks to Nick beating the living poop out of the poor sods he had to face after I wiped him out in round one), so I would have won the day! Groan!

I've never really thought of myself as being a "contender." I haven't spent a whole heap of money on the game (my brother bought me the starter box as part of his eternal debt to my foresight and wisdom - he knows what I did...) and I've maybe spent $200 of my own on other stuff. I don't have any of the Wave two ships or cards (as stated, I borrowed Hans and Ackbar from Theo for this day). I only just bought the Nebulon-B stand alone set as a result of winning $20 at this tournament - imagine how deadly I'll be now I have an xi7 and an intel officer!

Wiping out Nick in round one was remarkable - he had won the championship in Sydney the day before - and I was not at all prepared mentally for a fighter/player like Alex, who was quite happy to avoid contact at all, and just have a fighter skirmish - this was the first battle of Armada I had ever seen where no-one lost a capital ship. Truly amazing.

And then to face rival/mate/brother/traditionally-better-than-me Theo in the last round I had no confidence at all. When I realized I was going to win I "pulled up stumps" as we say in the old country, and just phoned it in. In retrospect, I should have turned left instead of right, trusted the Corvette to control the objectives by itself, and gunned for Theo's last Frigate - mine was still in pretty good order, I was spamming repair commands, and I had fighters and bombers with no one to shoot at. And I had Ackbar, who is an advantage all on his own. I should have stuck the boot in.

But, such is life.

A great tournament, a successful day all around, and second place ain't bad for an old dog like me.

Next time - oh yes, next time!

Tuesday, 26 January 2016

David's SpaceCon - Episode Three: Team Rebel! Heck Yeah!

Game three saw me at the last table, facing Dave K, who was also "0" from "2".

He had an interesting list of three ships with every possible upgrade, and one fighter.

I won initiative, chose second, and he chose "Most Wanted." This is the mission I most want my opponent to take, since it means I can get up to ten extra dice at the biggest ship on the field, while only making my corvette (which tends to avoid getting shot much anyway) a little more vulnerable.

Start of Turn 1 - we're both ignoring the right hand side of the space, with my NEBs deployed for slow and steady shooting, and the Assasult Frigate in Conga-Line formation with Corvette for back-up.
 Dave comes rushing out at me, while my ships fire everything they can at the Star Destroyer, ignoring the Gladiators.

 Turn 3, and the Imperials arrive. This looks a lot like the previous battle, except that my Frigates are on a flank and free to maneuver, and the NEBs have done their damage and are know fulfilling their secondary purpose: fodder. Even my fighters have managed to launch a strike on the ISD, while tying down the single imperial fighter/bomber.

I could have let Paragon finish off the ISD at this point, but let that honour go to one of the condemned NEB-Bs. It makes writing the letter to their loved ones so much easier... "I am honoured to inform you that your beloved wife has died in the cause of Galactic Liberty, destroying the Imperial Harbinger of Doom..."

 The Picture from the start of turn 4 is missing - this is the start of turn 5. The ISD is gone (and because of the mission counts as an extra 120 points for victory - nice!) as are the NEB-Bs. The Gladiators are now chasing the Assault Frigates around the loop, hoping for... I'm not sure what.

At this point I don't think there's much chance of the Imperials doing much damage, let alone taking out a Frigate. But, they keep chasing, and I keep shooting them, even slowing down to get better arcs. The fighters have finished off the Bounty Hunter, and have gathered near the Frigate in order to be in range of a squadron command passed on by Leia Organa. In this way, the front Gladiator is wiped out in short order.


 And the other Gladiator keeps on coming - at the start of turn 6, it is the only Imperial vessel remaining. And Zap-Brannigan-like, it charges straight at Paragon's guns...

At the end of turn 6, this is all that remains on the battle space - and its all mine.


This was a very solid victory, 10/0, with me scoring 520 points to the Imperials 102.

As a result of this very one-sided affair, I ended up bang in the middle of the tournament crowd, with 11 players ahead on points, and 11 behind.

On this occasion, I stuck to my game plan, and it worked. I probably only have one regret, which was letting the NEB-B finish the ISD when it could have shot at a Gladiator, but that made no real difference in the end.